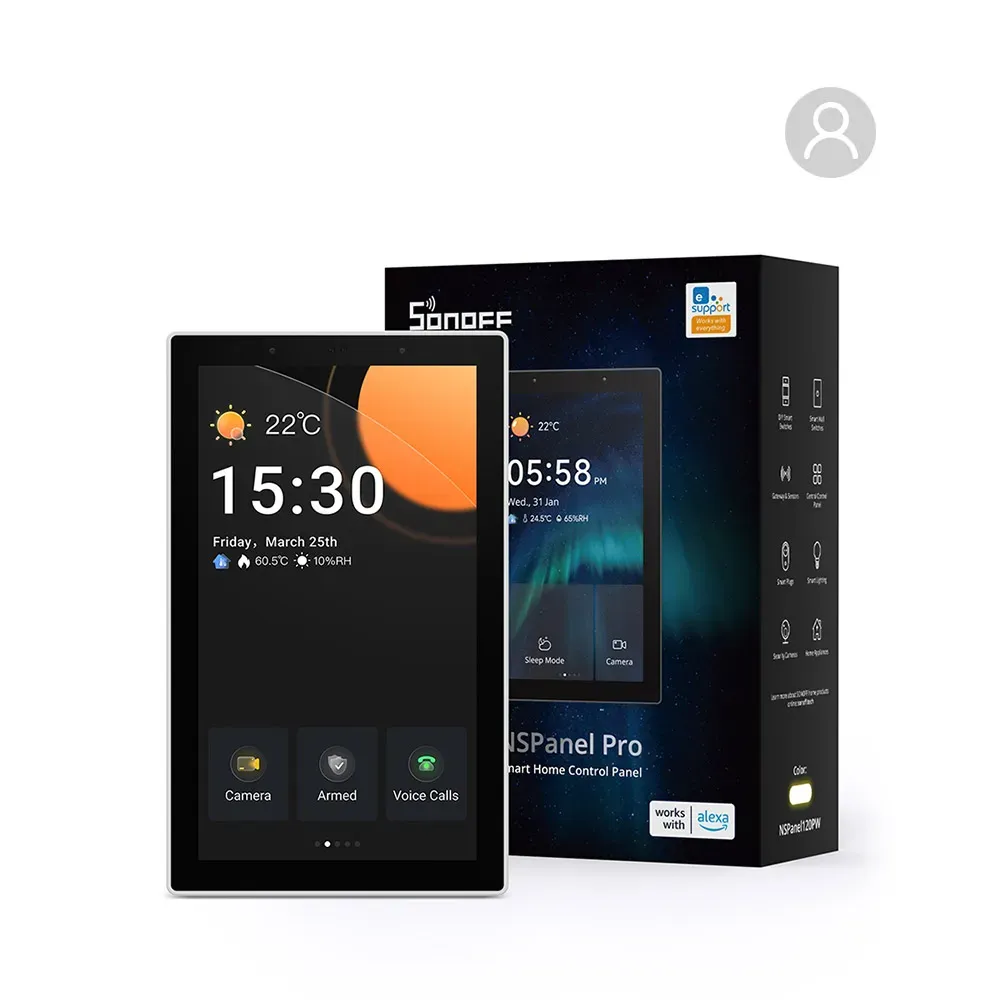
Sonoff NSPanel Pro 120: Introduction
In the past, I worked in the smart home industry and was always dissatisfied with touchscreen wall panels, as they had limited functionality and weren't customizable at all. As time passed, more options entered the market; however, they are still locked into the manufacturer's ecosystem and are not very flexible. In this series of articles, we will investigate the device and see how we can modify it.
The panel I've chosen to buy and customize is from the well-known manufacturer Sonoff, which is popular for making very robust hardware and solutions for the DIY community. The panel is based on the Rockchip RK3326 chip and thus should support Android and Linux.
Before even attempting to modify the software, it's a good idea to make a full backup of the device. This way, if I mess up somewhere, I'll have the chance to revert the changes. Less words, more moves—let's disassemble the device and see what we can do.
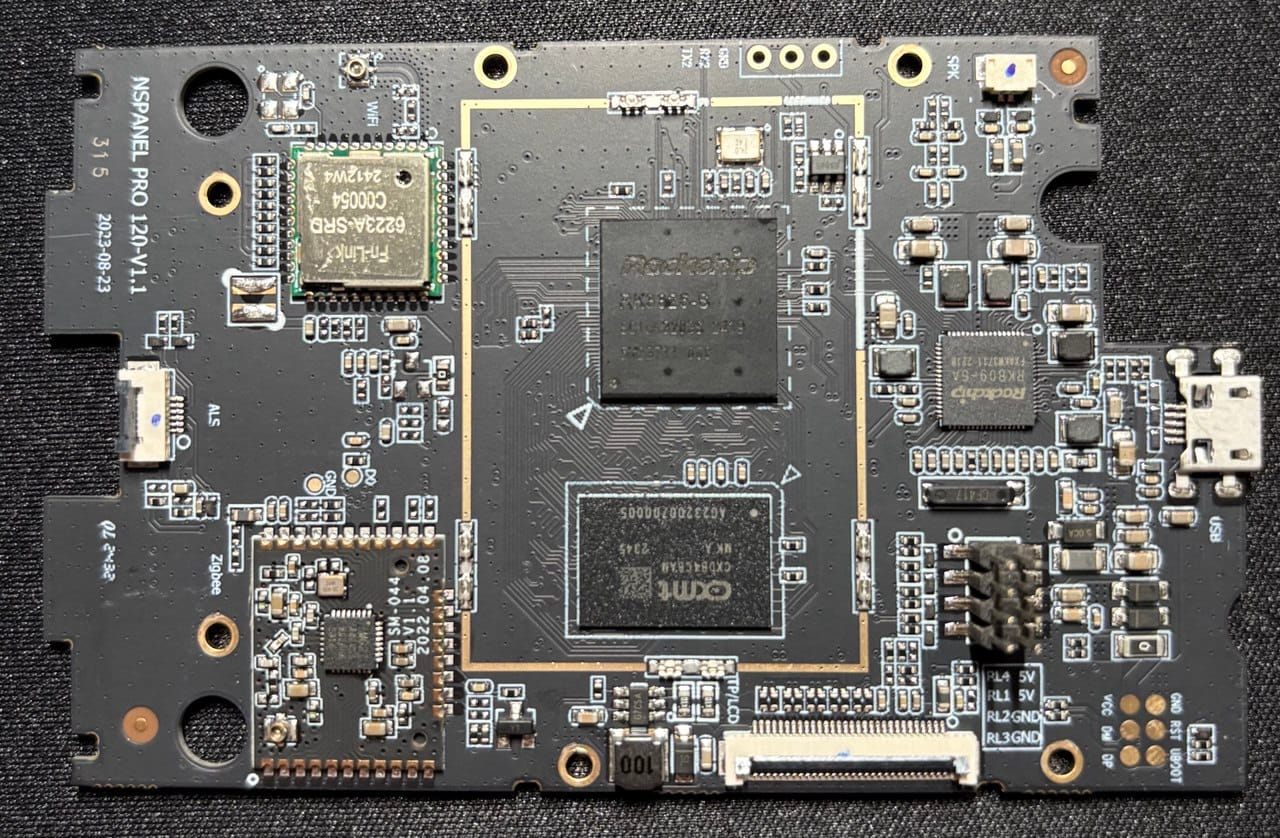
At the top side we see (left to right, top to bottom):
- small FFC connector: light a presence sensor
- Wifi/BT module FN-LINK 6223A-SRD
- Zigbee module EFR32MG21
- Rockchip RK3326-S
- CXDB4ABAM-MK LPDDR4X 2GB memory
- big FFC connector: LCD + Touchscreen
- speaker connector
- RK809 - power-management integrated circuit
- 8-pin connector to the wall mount power supply unit
- Micro USB port
- 6-pin test points that are exposed through the case
The bottom side:
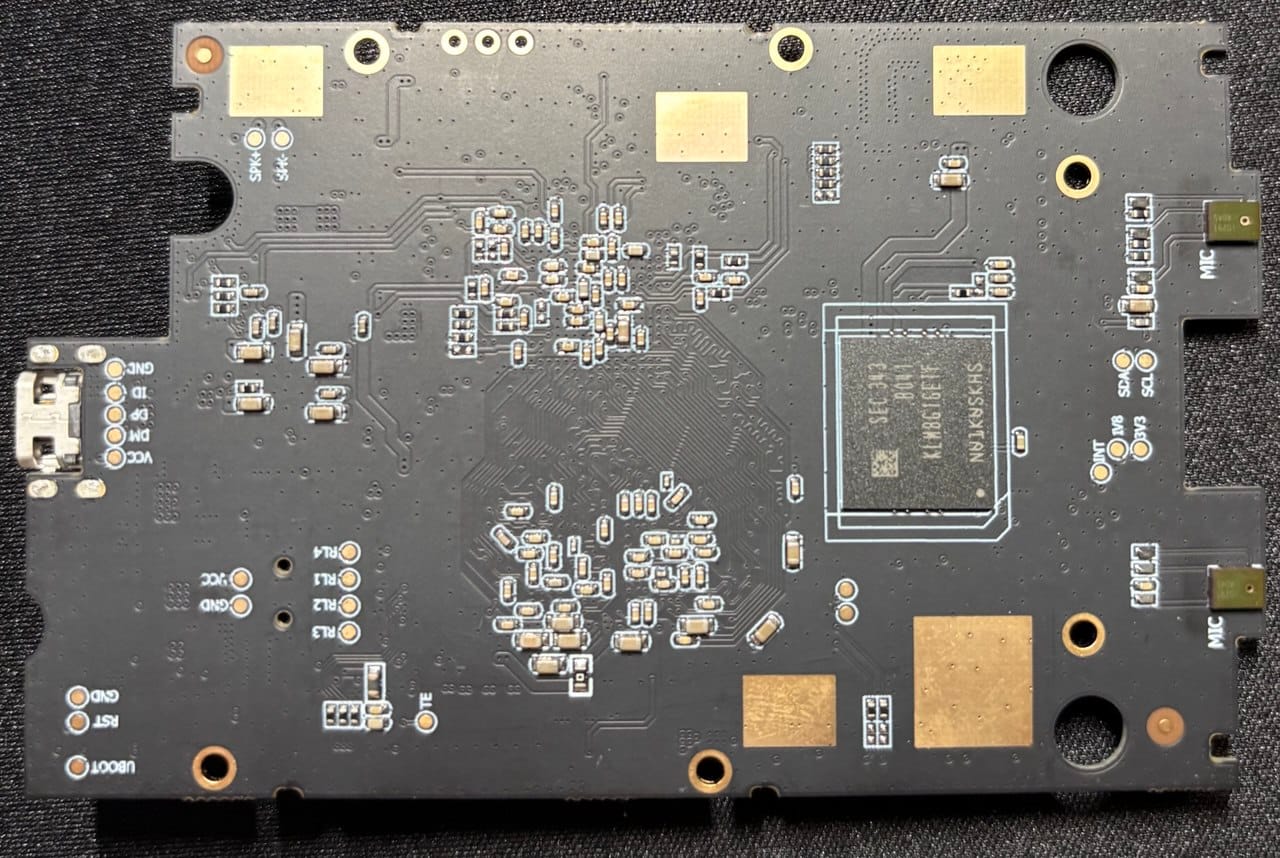
Here are the few elements:
- EMMC 5.1 KLM8G1GETF
- 2 MICs
Areas of great interest at this point are the Micro USB port and the 6-pin test point (TP). The pin that caught my attention was the UBOOT pin, along with DP, DM, and RST. Its purpose is to put the device into a special LOADER mode, enabling the download/upload of any partition to the device.
For Rockchip devices, the open-source utility to work with Rockchip hardware is rkdeveloptool. It will help us read all partitions and, in the future, install new firmware. Let's short the UBOOT pin to GND while plugging in the USB cable to see if that will show any RockUSB devices in sudo rkdeveloptool ld output.

BOOM! We can see a Rockchip device in (LOADER) mode! Great lets read out the partition table:
sudo rkdeveloptool pptPartition Info(GPT)
NO LBA Name
00 00004000 uboot
01 00006000 trust
02 00008000 misc
03 0000A000 resource
04 00012000 kernel
05 00022000 boot
06 00032000 recovery
07 00052000 backup
08 0008A000 security
09 0008C000 cache
10 0014C000 system
11 0044C000 metadata
12 00454000 vendor
13 00514000 oem
14 00594000 frp
15 00594400 smatek
16 0059C400 keypart
17 0059C600 STSN
18 0059C800 stbackIn the next article, we'll try to back up all partitions. It might seem tricky at first glance. Stay tuned!